5. Collection management

5.1
Inventory
Represents the area where all collection data is stored and managed. Allows you to view and manipulate individual objects and media items in the collection.
5.1.1
Search functions
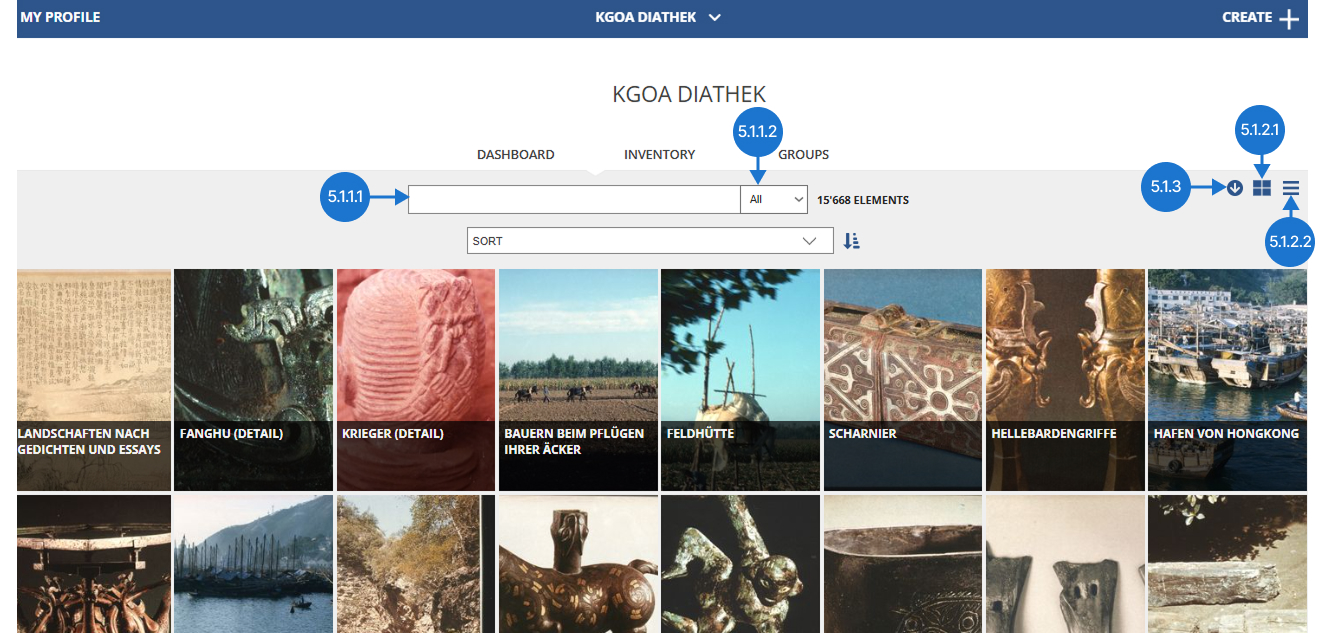
5.1.1.1
Searching by name
To search by name, type some or all of the item information in the search bar. Partial matches and case-insensitive entries are supported.
You can search among all attributes of an item or a specific attribute (e.g. title, date, subject). Multiple filters and search methods can be applied.
All attributes: Type text into the search bar and press "Enter". After clicking, a phrase will be pinned to the search bar.
This search method narrows the results to only those items that contain all the information contained in the search phrases.
Specific attribute: Type text in the search bar and click on the appropriate category from the list that appears. After that, the phrase will be pinned to the search bar.
Delete search filter: Hover over a pinned filter and click the "x" to remove it.
5.1.1.2
Searching by category
Available search categories are: objects, media, all categories (objects and media).
To change the category of items, click the labeled box and then select the appropriate category.
5.1.2
Elements view
5.1.2.1
Tiled view
In the tiled view, each element is represented as a tile containing the most important information, such as the title and thumbnail image.

5.1.2.1.1
Detailed view
To open a detailed view of an item, click on the item's preview area.
5.1.2.1.2
Sort by category
To sort items by their attribute type, expand the list by clicking the box labeled "Sort" and then select the appropriate attribute.
5.1.2.1.3
Sort by order
To select the sort order, click on the sort icon. Sorting is done in ascending or descending order.
5.1.2.2
Table view
In this view, the elements are displayed as a table with rows and columns. Each row represents an element and each column represents a data attribute.
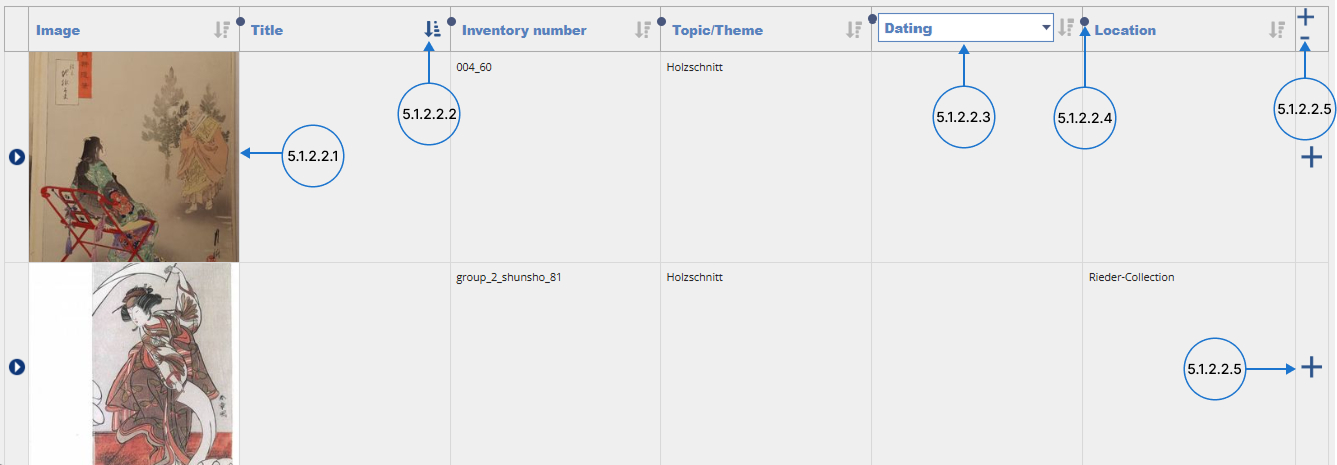
5.1.2.2.1
Detailed view
To open a detailed view of an item, click on the item's preview area or on the arrow sign.
5.1.2.2.2
Sorting function
In the table view, you can sort items in ascending or descending order based on attribute type. To sort select the appropriate attribute type (column) and click the sort icon.
5.1.2.2.3
Change attribute name
To change the displayed attribute of an element in a column, click on the attribute name. After clicking, a drop-down list will appear from which you can select the desired attribute type.
5.1.2.2.4
Adjust column size
To change the size of the column, click the resize point and then adjust the appropriate distance.
5.1.2.2.5
Add information criteria
To add an information criterion to the table (element attribute), click on the "+" icon.
5.1.3
Exporting elements
To export items, click the arrow icon. Then a window will appear with three export options: "Excel (.xlsx)", "CSV (.csv)", "Print".
5.1.3.1
Excel file
An Excel file is a spreadsheet document that includes data arranged in rows and columns. To export, click "Excel (.xlsx)".
5.1.3.2
CSV file
A CSV file is a file format for storing tabular data in plain text. In this type of file, each row represents a row of data, and commas separate each column value. To export, click "CSV (.csv)".
5.1.3.3
Printing
You can print the items currently displayed. The default print layout is a table. To export the file for printing, click "Print". After clicking, you will see the print format along with available options for managing the printout. Customize the document and click “Print” again.
5.2
Dashboard
This is the main menu tab corresponding to the management of a specific organisation.
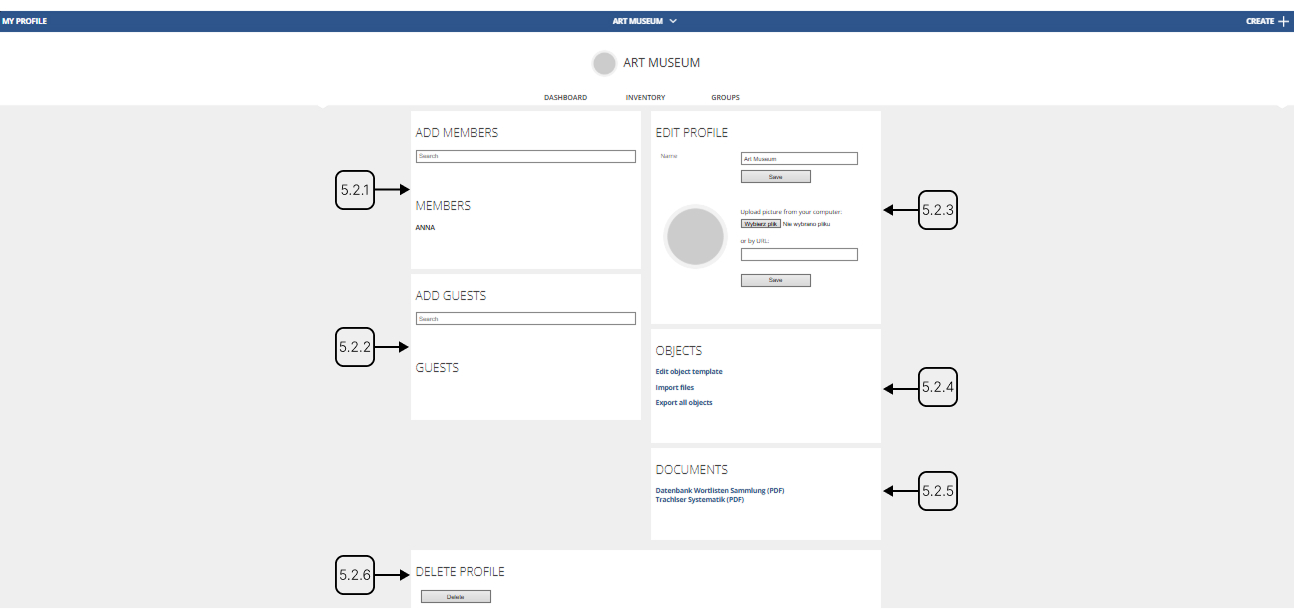
5.2.1
Members management
A member is a kind of user who has full access to edit or view collection resources. To add a member, search for a username and select option from the available list. Then confirm that you want to add a member. The member list is below the search bar.
5.2.2
Guests management
A guest is a type of user who can only view collection or group resources. A guest is not allowed to make changes. To add a guest, search for a username and select option from the available list. Then confirm that you want to add a guest. The guest list is located below the search bar.
5.2.3
Edit profile
Here you can update the organisation's information, such as changing the name or profile picture. To save changes, click "Save".
5.2.4
Objects
Object template:
In this section you can manage the object watermark settings, as well as customize the visibility of the object fields for specific types of users. To customize the object template, click "Edit object template". Then the page will be displayed.
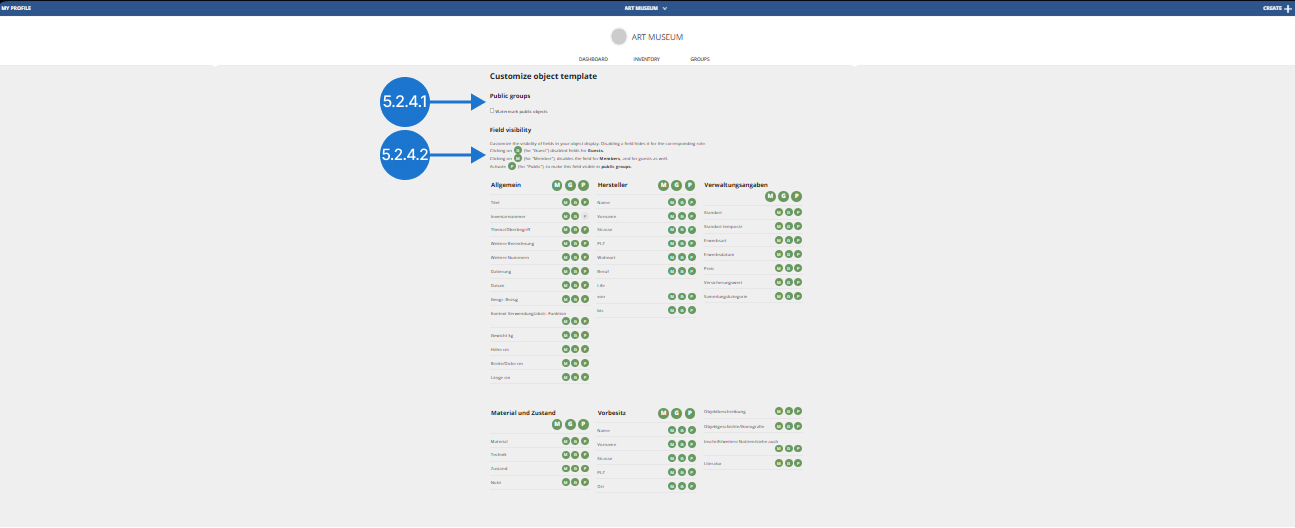
5.2.4.1
Watermarking
To enable or disable watermarking of public objects, click the labeled box under the section dedicated to "Public Groups".
5.2.4.2
Visibility of fields
To adjust field visibility, go to the "Field visibility" section. Available markings are G (for guests), M (for members and guests), P (for the public). Fields marked in green are visible. Non-green marks indicate hidden fields.
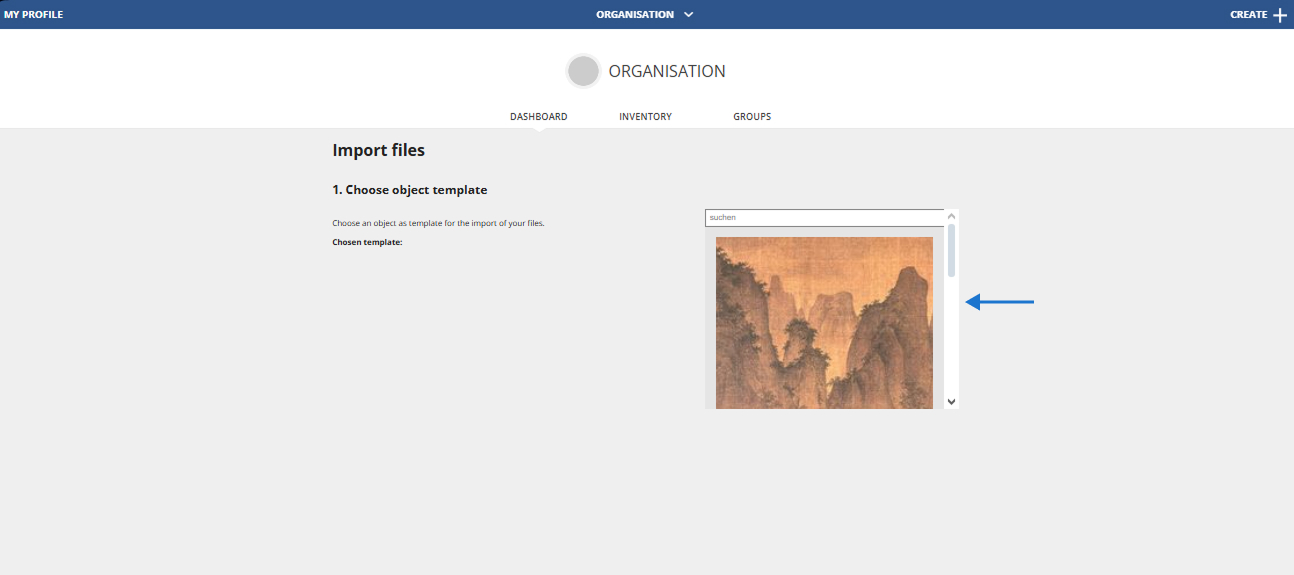
Import files:
This function allows you to import files using an object template. It creates a copy of the template and replaces the original file with your selection.
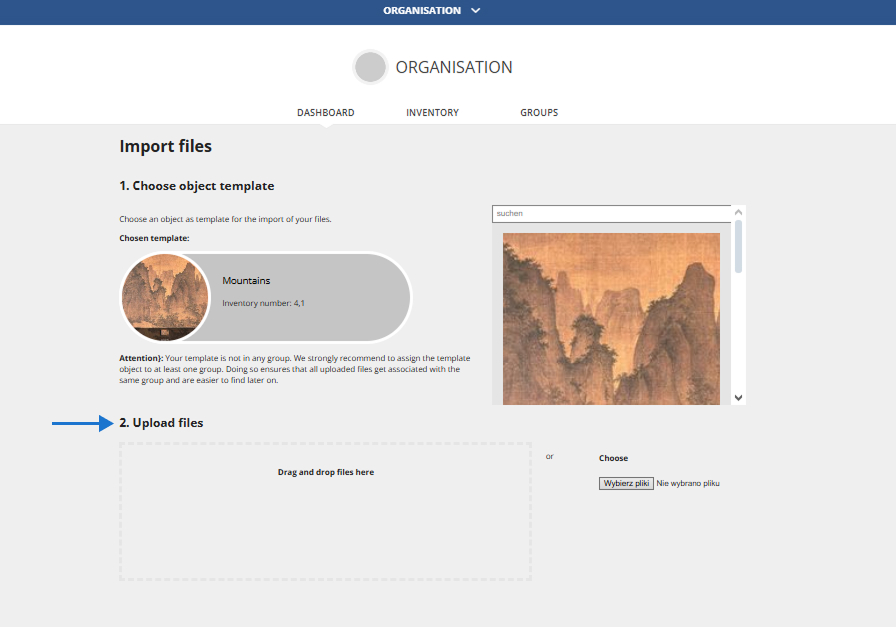
To import files to your organization according to the template, click on “Import Files”. You will then be redirected to a page where you can choose an object template. Select the template by searching for the appropriate item
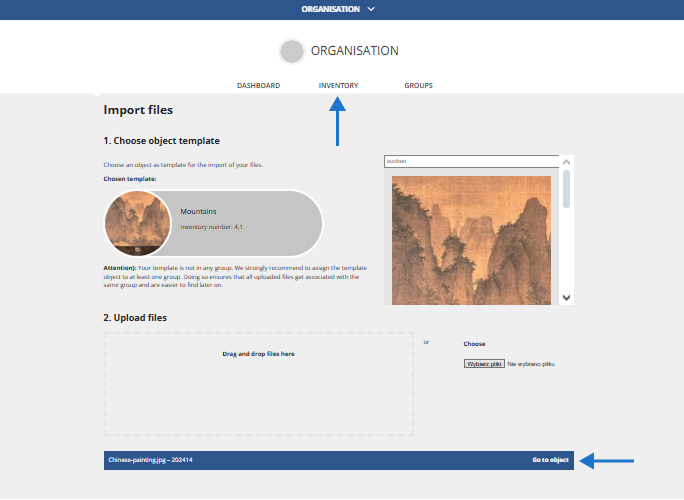
After setting the item template, upload the desired files. Click "Select Files" and select the appropriate files, confirming your selection with the "Open" button or drag and drop the files into the empty field on the left. Then the newly created item will be saved to your inventory.
To view the created item, click "Go to object" or check the “Inventory” tab.
Export objects:
To download all organization elements along with their documentation, click "Export all objects".
5.2.5
Documents
In this section you can download PDF files containing object classifications and lists of words used to define objects.
5.2.6
Delete profile
This action will delete all data associated with the organisation. A deleted organization profile cannot be recovered. To delete the profile, click the "Delete" button. Once clicked, confirm that you want to delete the profile.
5.3
Groups
This section is dedicated to groups and provides guidance on how to search for and manage groups of related objects.
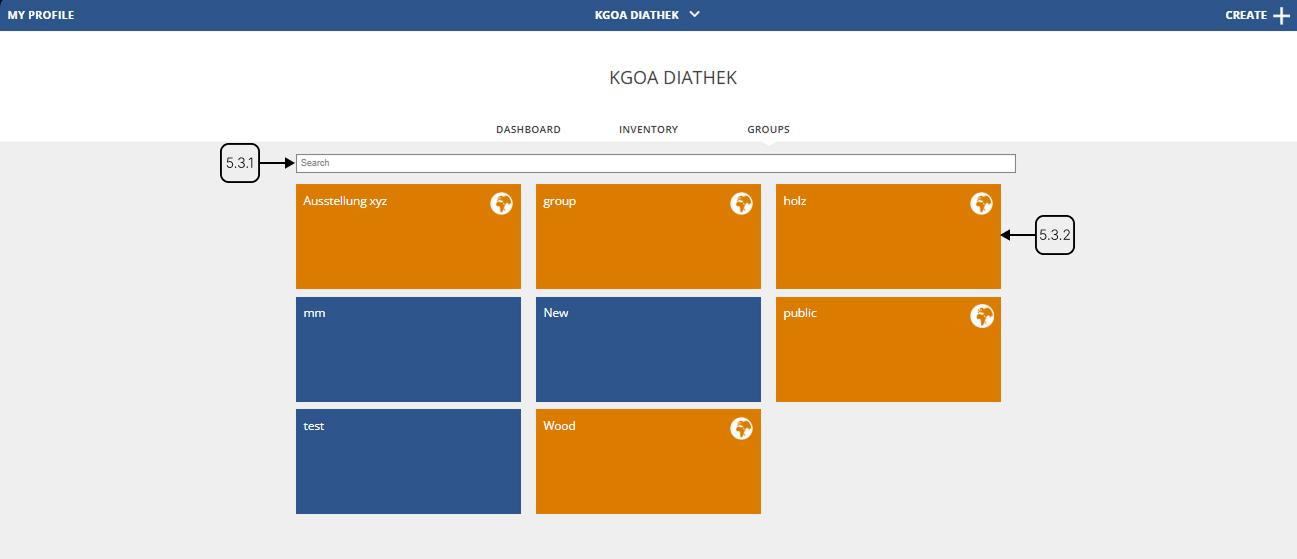
5.3.1
Search function
To search for a group name, use the search bar located above the displayed groups. In the search bar, you can enter a fragment of the group name or its full name. The results will appear automatically as you type.
5.3.2
Groups management
To manage a group, open a detailed view by clicking on the desired tile.
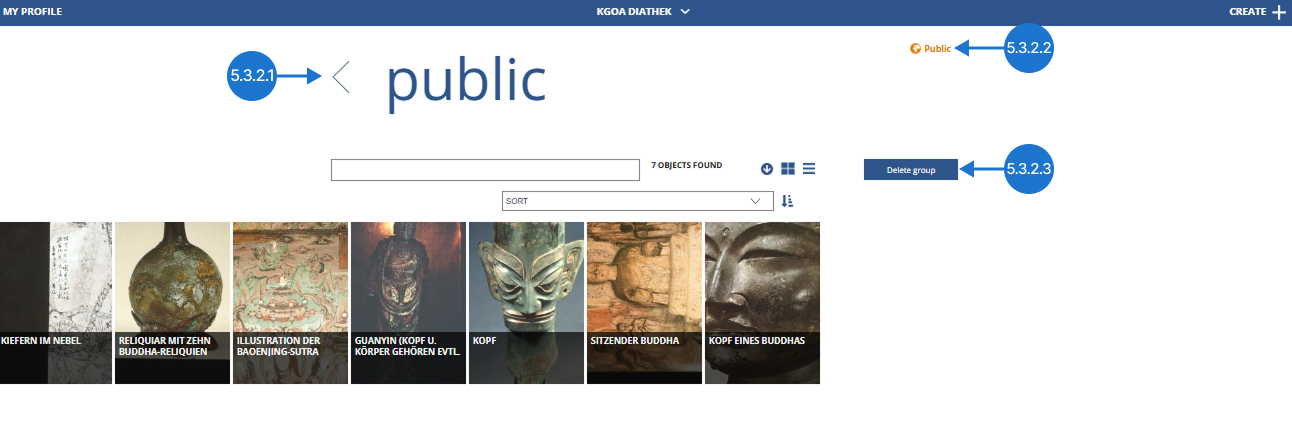
5.3.2.1
Change title
To change the name of the group, click in the title field and make the appropriate changes.
5.3.2.2
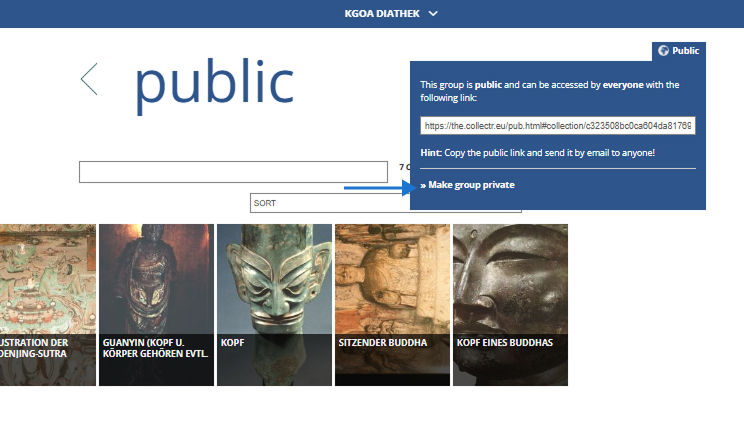
Change visibility
In Collectr, the group visibility settings determine whether a group can be viewed publicly. If a group is marked as public, anyone can access it via a link. If a group is marked as private, only members and guests can view it.
To change the visibility of a group, click on the field labeled "Public" or "Private". Then a window will appear with additional information about visibility access. Click on the label "Make group public" or "Make group private". Once the group is set to public, a window will display a link you can share.
5.3.2.3
Delete group
To delete a group, click the "Delete" button. After clicking, confirm that you want to delete the group.